Rejection Block
The Simple Version
A Rejection Block is a long wick that swept a level and reversed. Unlike Order Blocks (which use the candle body), Rejection Blocks focus on the wick. The wick shows where price was rejected.
Anatomy of a Rejection Wick
Find a candle with a long wick that poked above a high or below a low, then closed back inside the range. That wick is your Rejection Block.
Key features:
- The wick should be at least as long as the body (ideally 2x)
- The body closes back inside the prior range
- The wick swept a clear level (previous high, previous low, equal highs/lows)
Bullish Rejection: Long wick below, sweeping a low, body closes back up. Bearish Rejection: Long wick above, sweeping a high, body closes back down.
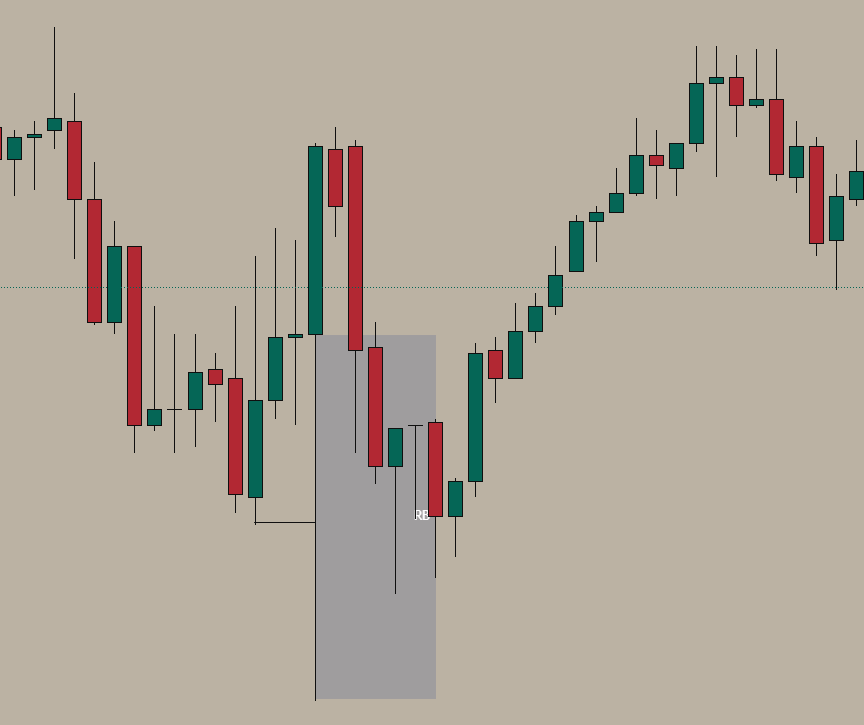
 Bullish Rejection Block
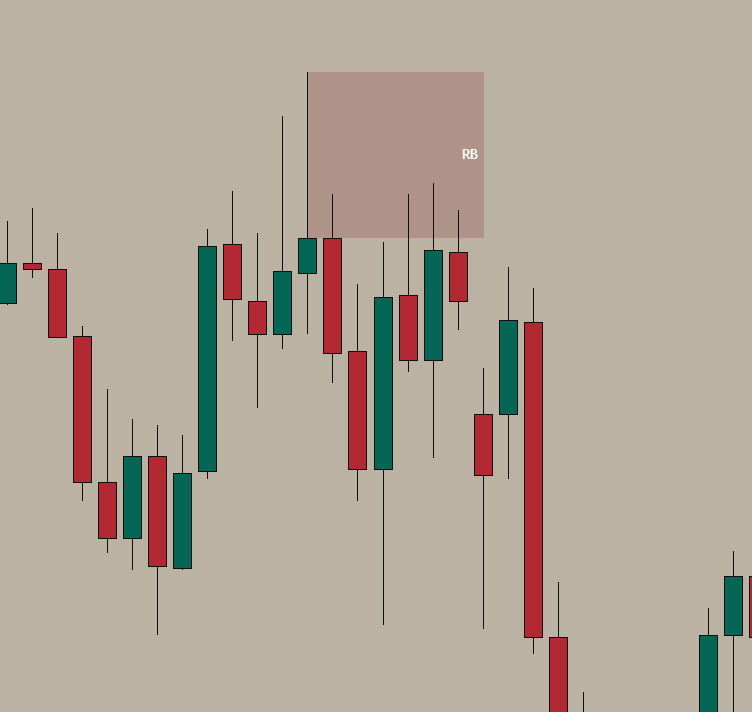
 Bearish Rejection Block
Why It Works
The wick shows where price tried to go but got rejected. Stops were triggered at that level. Institutions used the liquidity grab to fill orders, then reversed.
When price returns to that wick zone, it often reacts again.
 Rejection Block with liquidity sweep
How to Find It
- Find a candle with a long wick that swept a level
- Check that the body closed back inside the range
- Mark the wick from tip to where the body begins
- Note the 50% level of the wick
How to Trade It
Entry: Wait for price to return to the rejection wick. Enter at the 50% level of the wick.
Stop: Beyond the wick tip.
Target: Next significant level in the direction of the rejection.
 Rejection Block with deep retracement
When It Fails
A Rejection Block is invalid when price closes beyond the wick tip. This means the rejection wasn’t strong enough.
Multiple tests of the same wick weaken it over time.
 Rejection Block with multiple reactions
Quality Check
High-quality Rejection Block:
- Swept significant liquidity (session high/low, equal highs/lows)
- Wick is 2x+ the body length
- Strong move followed the rejection
- Aligns with the bigger trend
 H1 Rejection Block
Low-quality Rejection Block:
- Random wick, no clear level swept
- Wick barely larger than body
- No follow-through after the rejection
- Against the bigger trend
Where It Shines
Rejection Blocks are one of the few setups that work well in ranging markets. In a range, the highs and lows get swept constantly, creating rejection wicks at both ends.
In trending markets, they provide continuation entries after pullbacks sweep levels.
Common Mistakes
Marking the body instead of the wick. Rejection Blocks are about wicks. The body is an Order Block.
No clear level swept. A random wick isn’t a Rejection Block. It needs to sweep an obvious level.
Fighting the trend. A rejection against the bigger trend usually fails.
Rejections as Judas Swings
Rejection Blocks on their own are just patterns. They have no statistical edge in isolation. What gives them power is context - when they align with a trading model.
Example: The rejection wick IS the Judas move - the false direction that traps breakout traders. Price sweeps a level, triggers stops, then reverses. The wick marks exactly where the trap happened. When you trade the rejection, you’re fading the Judas - entering in the true direction after the fake move is complete.
Quick Checklist
- Clear level was swept (not just a random wick)
- Wick is at least as long as the body
- Body closed back inside the range
- Strong move followed the rejection
- 50% of wick marked for entry